


Writing tests is a crucial, though not always the most popular, part of software development. While it often comes after some code has been put together and is ready for production, testing ensures that the code performs its intended functionality.
Detox
A robust framework for testing React Native Applications by interacting with them just like a real user. It essentially does what Cypress does for web applications, allowing end-to-end testing for both iOS and Android Platforms.
Prerequisites
This is a guide for when one needs to add Detox to an existing application. So this assumes the expo application is already up and running.
Nodejs
Expo Cli
Expo Project
Steps
- We need to first configure detox to run in our expo project. Run the command below
npm install --save-dev @config-plugins/detox
- Open app.json and add the plugin we just installed to the plugins list. This will configure the Android native code to support detox
{
  "expo": {
    // ...
    "plugins": ["@config-plugins/detox"]
  }
}
- Run Prebuild so we can generate native files, these are Android and iOS files.
npx expo prebuild
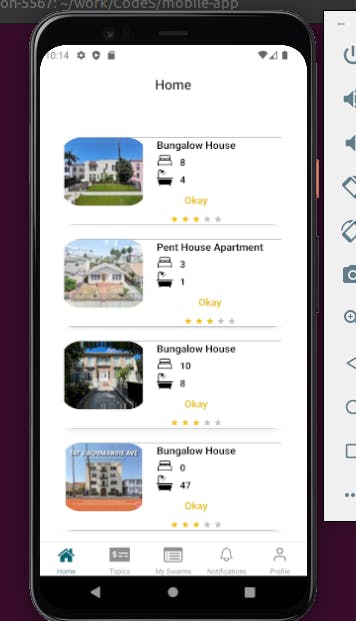
- Now, let us add testID to our elements so that we can have something to test. In this case, we shall be testing a list of properties that should be displayed on the home screen after an Activity indicator has finished loading. This is to allow our data to be fetched from the API.
  return (
    <View style={styles.container}>
      <ScrollView>
        {loading ? (
          <View testID="loading-indicator" style={styles.loader}>
            <ActivityIndicator size={"large"} />
          </View>
        ) : (
          <SummaryList data={dataL} />
        )}
      </ScrollView>
    </View>
  );
};
- Then we add a testId to the Summary list so that when the list is rendered we can check for its visibility on the screen
const SummaryList = (props: IProps) => {
  const { data } = props;
  useEffect(() => {}, []);

  return (
    <View testID="summary-list" style={{ paddingBottom: 80 }}>
      {data?.length > 0 &&
        data?.map((item, index) => {

        return <SummaryListCard
            key={index}
            description={item?.products?.brand_name}
            title={item?.status}
            image={item?.primary_photo?.href}
            baths={item?.description?.baths}
            family={item?.description?.type}
            price={300000}
            size={item?.description?.sqft}
            bedrooms={item.description.beds}
            propertyId={item.property_id}
          />
})}
    </View>
  );
};
- Now we set up Detox by installing Jest plus Detox. You can choose to install Jest or Mocha we do this because Detox doesn't have it's own test runner so we piggyback on Jest.
npm install --save-dev jest detox
npx detox init -r jest
Now after running detox init we need to specify the build command and path to the binary produced by it. The file generated by the detox init is .detoxrc.js replace the contents in it with the following configurations
/** @type {Detox.DetoxConfig} */
module.exports = {
  logger: {
    level: process.env.CI ? 'debug' : undefined,
  },
  testRunner: {
    $0: 'jest',
    args: {
      config: 'e2e/jest.config.js',
      _: ['e2e'],
    },
  },
  artifacts: {
    plugins: {
      log: process.env.CI ? 'failing' : undefined,
      screenshot: 'failing',
    },
  },
  apps: {
    'ios.release': {
      type: 'ios.app',
      build:
        'xcodebuild -workspace ios/eastestsexample.xcworkspace -scheme eastestsexample -configuration Release -sdk iphonesimulator -arch x86_64 -derivedDataPath ios/build',
      binaryPath: 'ios/build/Build/Products/Release-iphonesimulator/eastestsexample.app',
    },
    'android.release': {
      type: 'android.apk',
      build:
        'cd android && ./gradlew :app:assembleRelease :app:assembleAndroidTest -DtestBuildType=release && cd ..',
      binaryPath: 'android/app/build/outputs/apk/release/app-release.apk',
    },
  },
  devices: {
    simulator: {
      type: 'ios.simulator',
      device: {
        type: 'iPhone 14',
      },
    },
    emulator: {
      type: 'android.emulator',
      device: {
        avdName: 'pixel_4',
      },
    },
  },
  configurations: {
    'ios.release': {
      device: 'simulator',
      app: 'ios.release',
    },
    'android.release': {
      device: 'emulator',
      app: 'android.release',
    },
  },
};
Note the emulator object should contain the device name of your specific emulator.
Next We run the following command to enable Detox build, allowing us to execute the tests locally.
npx detox build --configuration android.release
- Now let us add the tests in our e2e folder in the file starter.test.js
describe('HomeView', () => {
  beforeEach(async () => {
// Start the app in the device or emulator
    await device.launchApp()
    await device.reloadReactNative();
  });

  it('should render SummaryList when data is loaded', async () => {
    // Wait for the loading indicator to disappear
    await waitFor(element(by.id('loading-indicator')))
      .toBeNotVisible()
      .withTimeout(5000)

    // Now, check if theSummaryList is visible
    await expect(element(by.id('summary-list'))).toBeVisible();
  });
});
- Now for the magic to happen let us run the tests
npx detox test --configuration android.release
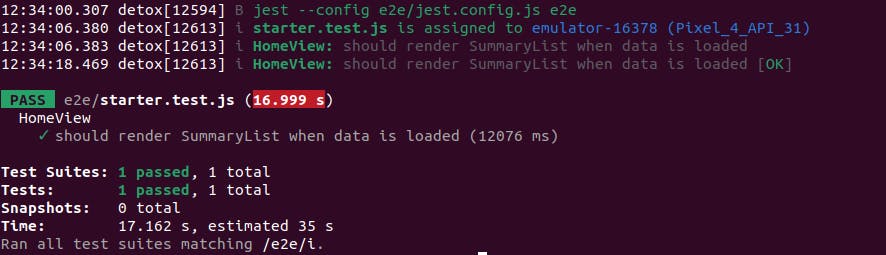
Voila! the tests pass the moment the data is loaded. Our code is doing what it is supposed to do
Now we can add testIds to our elements and add more tests accordingly.
Till next time happy coding.